
From the Dairy: The Homemade Ice Cream Recipe You’ve Been Looking For
This post contains affiliate links. As Amazon Associates, we earn from qualifying purchases. That means if you click on one of the links below and choose to make a purchase, we make a small commission at no extra cost to you. Thank you for your support of this blog.
Investing in an ice cream maker and learning how to make your own ice cream is well worth it.
You can cut costs and avoid the questionable ingredients found in grocery store ice creams.
Not to mention that if you’re sourcing high quality, farm fresh, grass-fed cream and eggs, and using natural sweeteners, you don’t need to think about ice cream as a guilty pleasure any more. It’s a nutritional powerhouse loaded with healthy animal fats, beneficial bacteria (if your cream is raw), and all kinds of goodies.
Finally, think about this: having some homemade ice cream in the freezer positions you for the ultimate parenting “checkmate” maneuver. You can bribe your kid to finish his or her dinner with the prize of a dessert that you secretly know is more nutrient dense than the average American lunch.
The only problem with homemade ice cream is that texture is frequently a challenge. It can taste a bit . . . “frosty,” especially if you store it for any length of time, and especially if you are trying to use natural sweeteners, which are usually liquid (maple syrup or honey).
To avoid this issue some recipes call for making complicated custards. The downside is that you have to stir your pot over the stove for goodness-knows-how-long awaiting the elusive “thickening” that always seems to take forever. (Anybody else??) Meanwhile, you’re also cooking away all the beneficial bacteria in your raw milk.
BUT
We’ve had a steady supply of cream this summer (partly a side-effect of feeding Blossom skim-milk every day). We’re happy to report that with some experimentation, we’ve found the answer!
Ice cream that:
- Has that perfectly thick and creamy texture you’ve been looking for
- Is quick and simple to make
- Stores well in the freezer
- Is made with only simple and healthy ingredients
- Keeps raw cream raw
The secret?
Grass-fed beef gelatin.
Grass-fed Beef Gelatin
Gelatin is the secret ingredient we use to get our ice cream to that perfect texture . . . easily!
Beef gelatin comes from the bones, hides, joints, and connective tissues of cows. If you make your own bone broth, you may have noticed the beef gelatin in it, as good broth will have a “jello” consistency when chilled.
Gelatin doesn’t just have the property of making thick and delicious ice cream. Due to its high collagen content, beef gelatin has its own list of health benefits, that you can learn more about here. Some people even use it as a supplement.
We think it is possible to make your own gelatin powder by essentially dehydrating bone broth into powder and probably filtering it in some way too . . .. But we’ve never tried this. Maybe we would if we were real homesteaders. We choose our battles and buy this grass-fed gelatin powder.
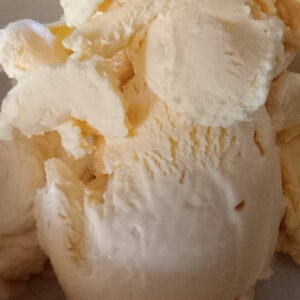
Dissolving beef gelatin into our ice cream mix gives our ice cream that thick and creamy consistency often elusive for at-home ice cream makers.
How to Make Homemade Ice Cream
Start by combining cream, vanilla, sweetener, and cocoa powder (for chocolate ice cream) in a large bowl. The ice cream will be creamier and richer if you use only cream, but you can substitute up to about half the cream with milk if you don’t have enough cream available.
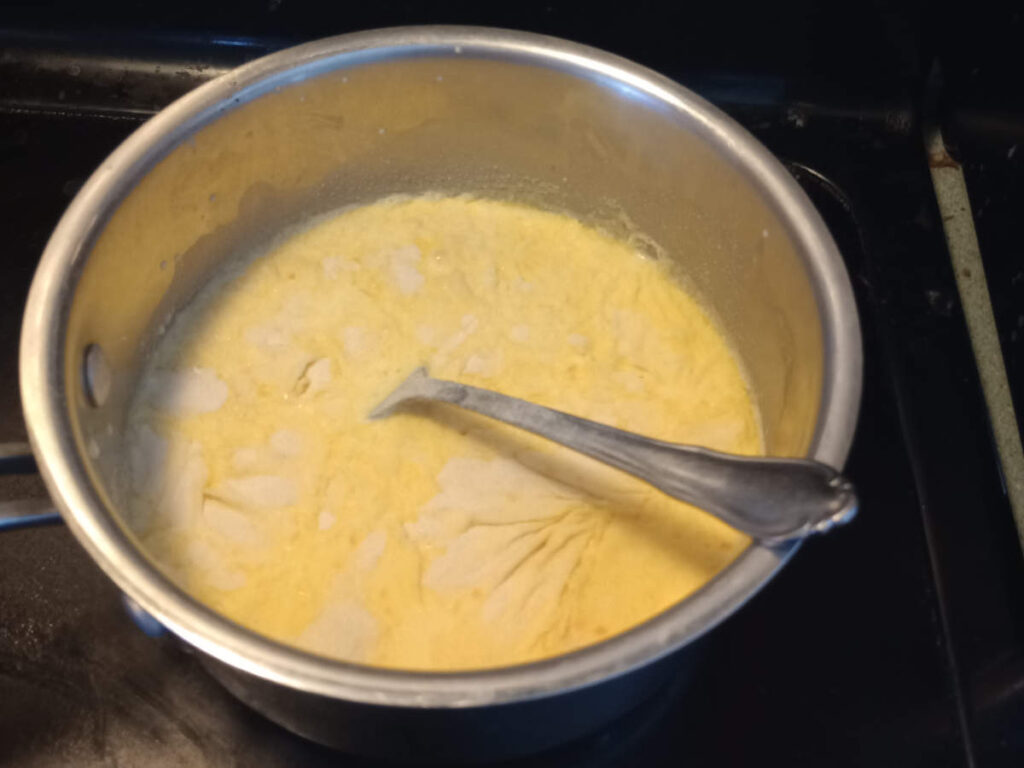
Place egg yolks in a saucepan and whisk in about two cups of the cream mixture. Egg yolks are also optional, but also add to the richness and creaminess.
Sprinkle the gelatin over the mixture in the saucepan and allow to sit for a minute or so. Then stir in the gelatin while gently heating the mixture until the gelatin dissolves. The mixture does not need to boil. Bathwater warm, or slightly warmer is usually enough to dissolve the gelatin. Dissolving the gelatin only takes a few minutes.
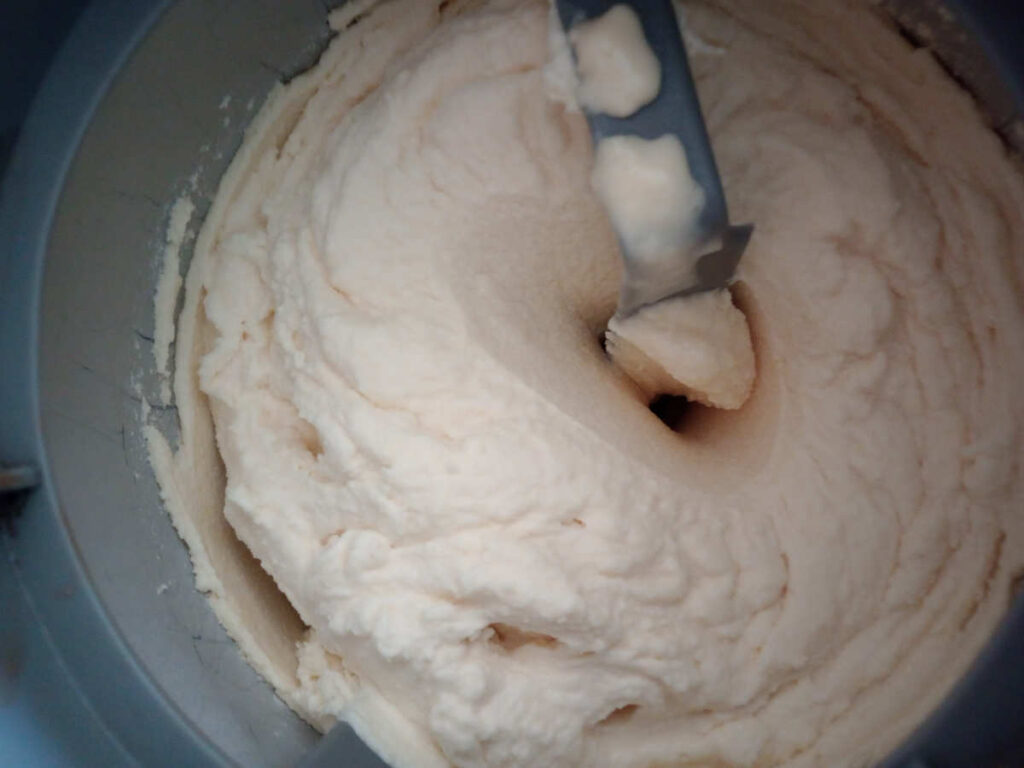
Return the contents of the saucepan to the original bowl, stirring well to combine, and place, covered, in the refrigerator for a few hours (or up to a couple of days) to chill and allow gelatin to set. (At this stage, you can even skip the ice cream making step and eat it as a delicious pudding-type dessert).
When ready, churn in your ice cream maker according to the manufacturer’s directions.
Tips
You do need to plan ahead to allow time for the gelatin mixture to set. However, this does have the benefit that you can make the ice cream mix in advance, and dessert time becomes a breeze. We’ve also found that our ice cream maker works better with a mixture that is at refrigerator temperature before we start churning.
Make sure the bowl of your ice cream maker is thoroughly chilled before churning. We have found that our chest freezers don’t get ours cold enough to get a good freeze on ice cream so we keep it in the freezer above our fridge.
You can make this ice cream in advance and keep in the freezer and the consistency will still be good. If you freeze it for more than an hour or so before serving, you’ll need to pull it out and give it about an hour to get “scoop-able.” The gelatinous consistency will help it thaw out well.the gelatin will prevent the edges from turning into rivers of milk.
We hope you’ll give this ice cream recipe a try.
It was developed with the experimental abilities provided by a steady stream of milk and cream into the kitchen, and it’s truly the best homemade ice cream we’ve ever had.
Chocolate lover? Scroll down to the notes to find our adaptation for cholate ice cream.
Healthy Homemade Ice Cream
Ingredients
- 7 cups cream
- 1 TBS vanilla
- 1/4 cup honey or maple syrup
- 1 tbs grassfed beef gelatin
- 2 egg yolks (optional)
Instructions
- Combine cream, vanilla, honey or maple syrup, and cocoa powder (if making chocolate ice cream) in a large bowl7 cups cream 1 TBS vanilla 1/4 cup honey or maple syrup
- Place egg yolks in a saucepan and add about two cups of the cream mixture. Whisk to combine.2 egg yolks
- Sprinkle gelatin over the egg yolk mixture and let sit for a few seconds.1 tbs grassfed beef gelatin
- Gently heat and whisk the mixture in the saucepan for a few minutes until gelatin is dissolved. It does not need to boil. A bathwater temperature should be sufficient to dissolve the gelatin.
- Whisk the mixture from the saucepan into the remaining ingredients in the large bowl.
- Refrigerate for 2-3 hours (minimum) to allow the gelatin to set. At this point you can keep the mixture in the fridge for a day or two until you are ready to churn the ice cream.
- Churn ice cream according to the directions of your ice cream maker.


